How to Install the Perfect Herringbone Feature Wall
What’s up guys? Dave here! We’re currently renovating our Guest Room, which happens to be one of the favorites in our home due to the beautiful natural light that beams in each morning. I’ve always been a morning person so the sun just energizes me and helps me get my day off to the perfect start. Plus, we have little birds, rabbits, and chipmunks that hang out back there; It’s basically a Disney movie in my backyard. Who wouldn’t want to wake up to that scene every morning?!
So, I was off this weekend and had time to work on a project for our Guest Room that I’ve been planning for weeks now. Not too long ago, Tyna propositioned me with the idea of a feature wall for our guest bedroom so we hashed out a few different ideas. We eventually settled on a chevron wallpaper scheme but there was one problem — the one we liked was around $800.00 and if you know me, I’m a little…uh…frugal, thrifty….cheap. Honestly, I thought it was beautiful but it wasn’t in the budget; it was a no-go for me!
Since we couldn’t go that route, we brainstormed more cost effective ideas that would still give us the look we were going for. We thought about painting the pattern but Tyna wanted more textured, 3D feel. I suggested another idea including a herringbone pattern using wood, instead but it also looked too flat.
Eventually we came across a video on Instagram by Our Faux Farmhouse where they’d installed a wall using the same idea with two minor but very extremely important changes in detail. First, instead of solid wood they used MDF boards which are paintable, less expensive and lighter than wood. Secondly, they routed the edges of the boards which really made the design pop.
After watching, we were really inspired and realized the video had completely transformed the idea for us so we decided to move forward with installing our own wall. Here’s how we did it!
Cut List
½” x 4’L x 6”W MDF Boards: If you don’t own a table saw, visit your local hardware store to have their team members provide the cuts for you.
Tools & Supplies
Miter Saw: You’ll need this to cut precise 90° and 45° angles because one incorrect cut can compromise the entire pattern. You could also use a circular saw in a pinch but accuracy is extremely important for this project.
Router: This is how you’ll round-off the edges in order to create depth.
Level: How will you know if a board is at a 45° angle without this? Short answer: you won’t.
Measuring Tape: Accurate measurements are vital to this project. One board cut too long or short will negatively impact the whole wall.
Nail Gun: You’ll use this to apply the boards.
Air Compressor: If you’re using a battery-powered or cordless nailer then you can skip this one. However, If you are using a pneumatic nail gun you’ll need this to make the pneumatic gun work.
Tips & Tricks
Measure each end piece individually because most walls aren’t 100% straight or even.
Measure the first piece to ensure that it is an exact 45º angle, don’t “eyeball” it (seriously).
Take a step back periodically to check your pattern.
Save your scraps to use for the smaller sections.
Instructions
Cut the MDF Board into 4’L x 6”W strips. Again, if you don’t own a table saw, ask the team at yout local hardware store to make the cuts for you; they’re usually more than happy to help!
Use your router to round-off the edges of each board strip.
Measure the entire wall and divide it’s total length in half, to find the center point.
Mark the wall’s center to denote your starting point.
Using your Level tool, place your first board at a 45º angle and nail it to the wall, securing the strip.
Line your second board next to the first strip in a “V” shape, ensuring both strips are completely flush with the other.
Continue the pattern until you’ve completed the entire wall.
Caulk the edges.
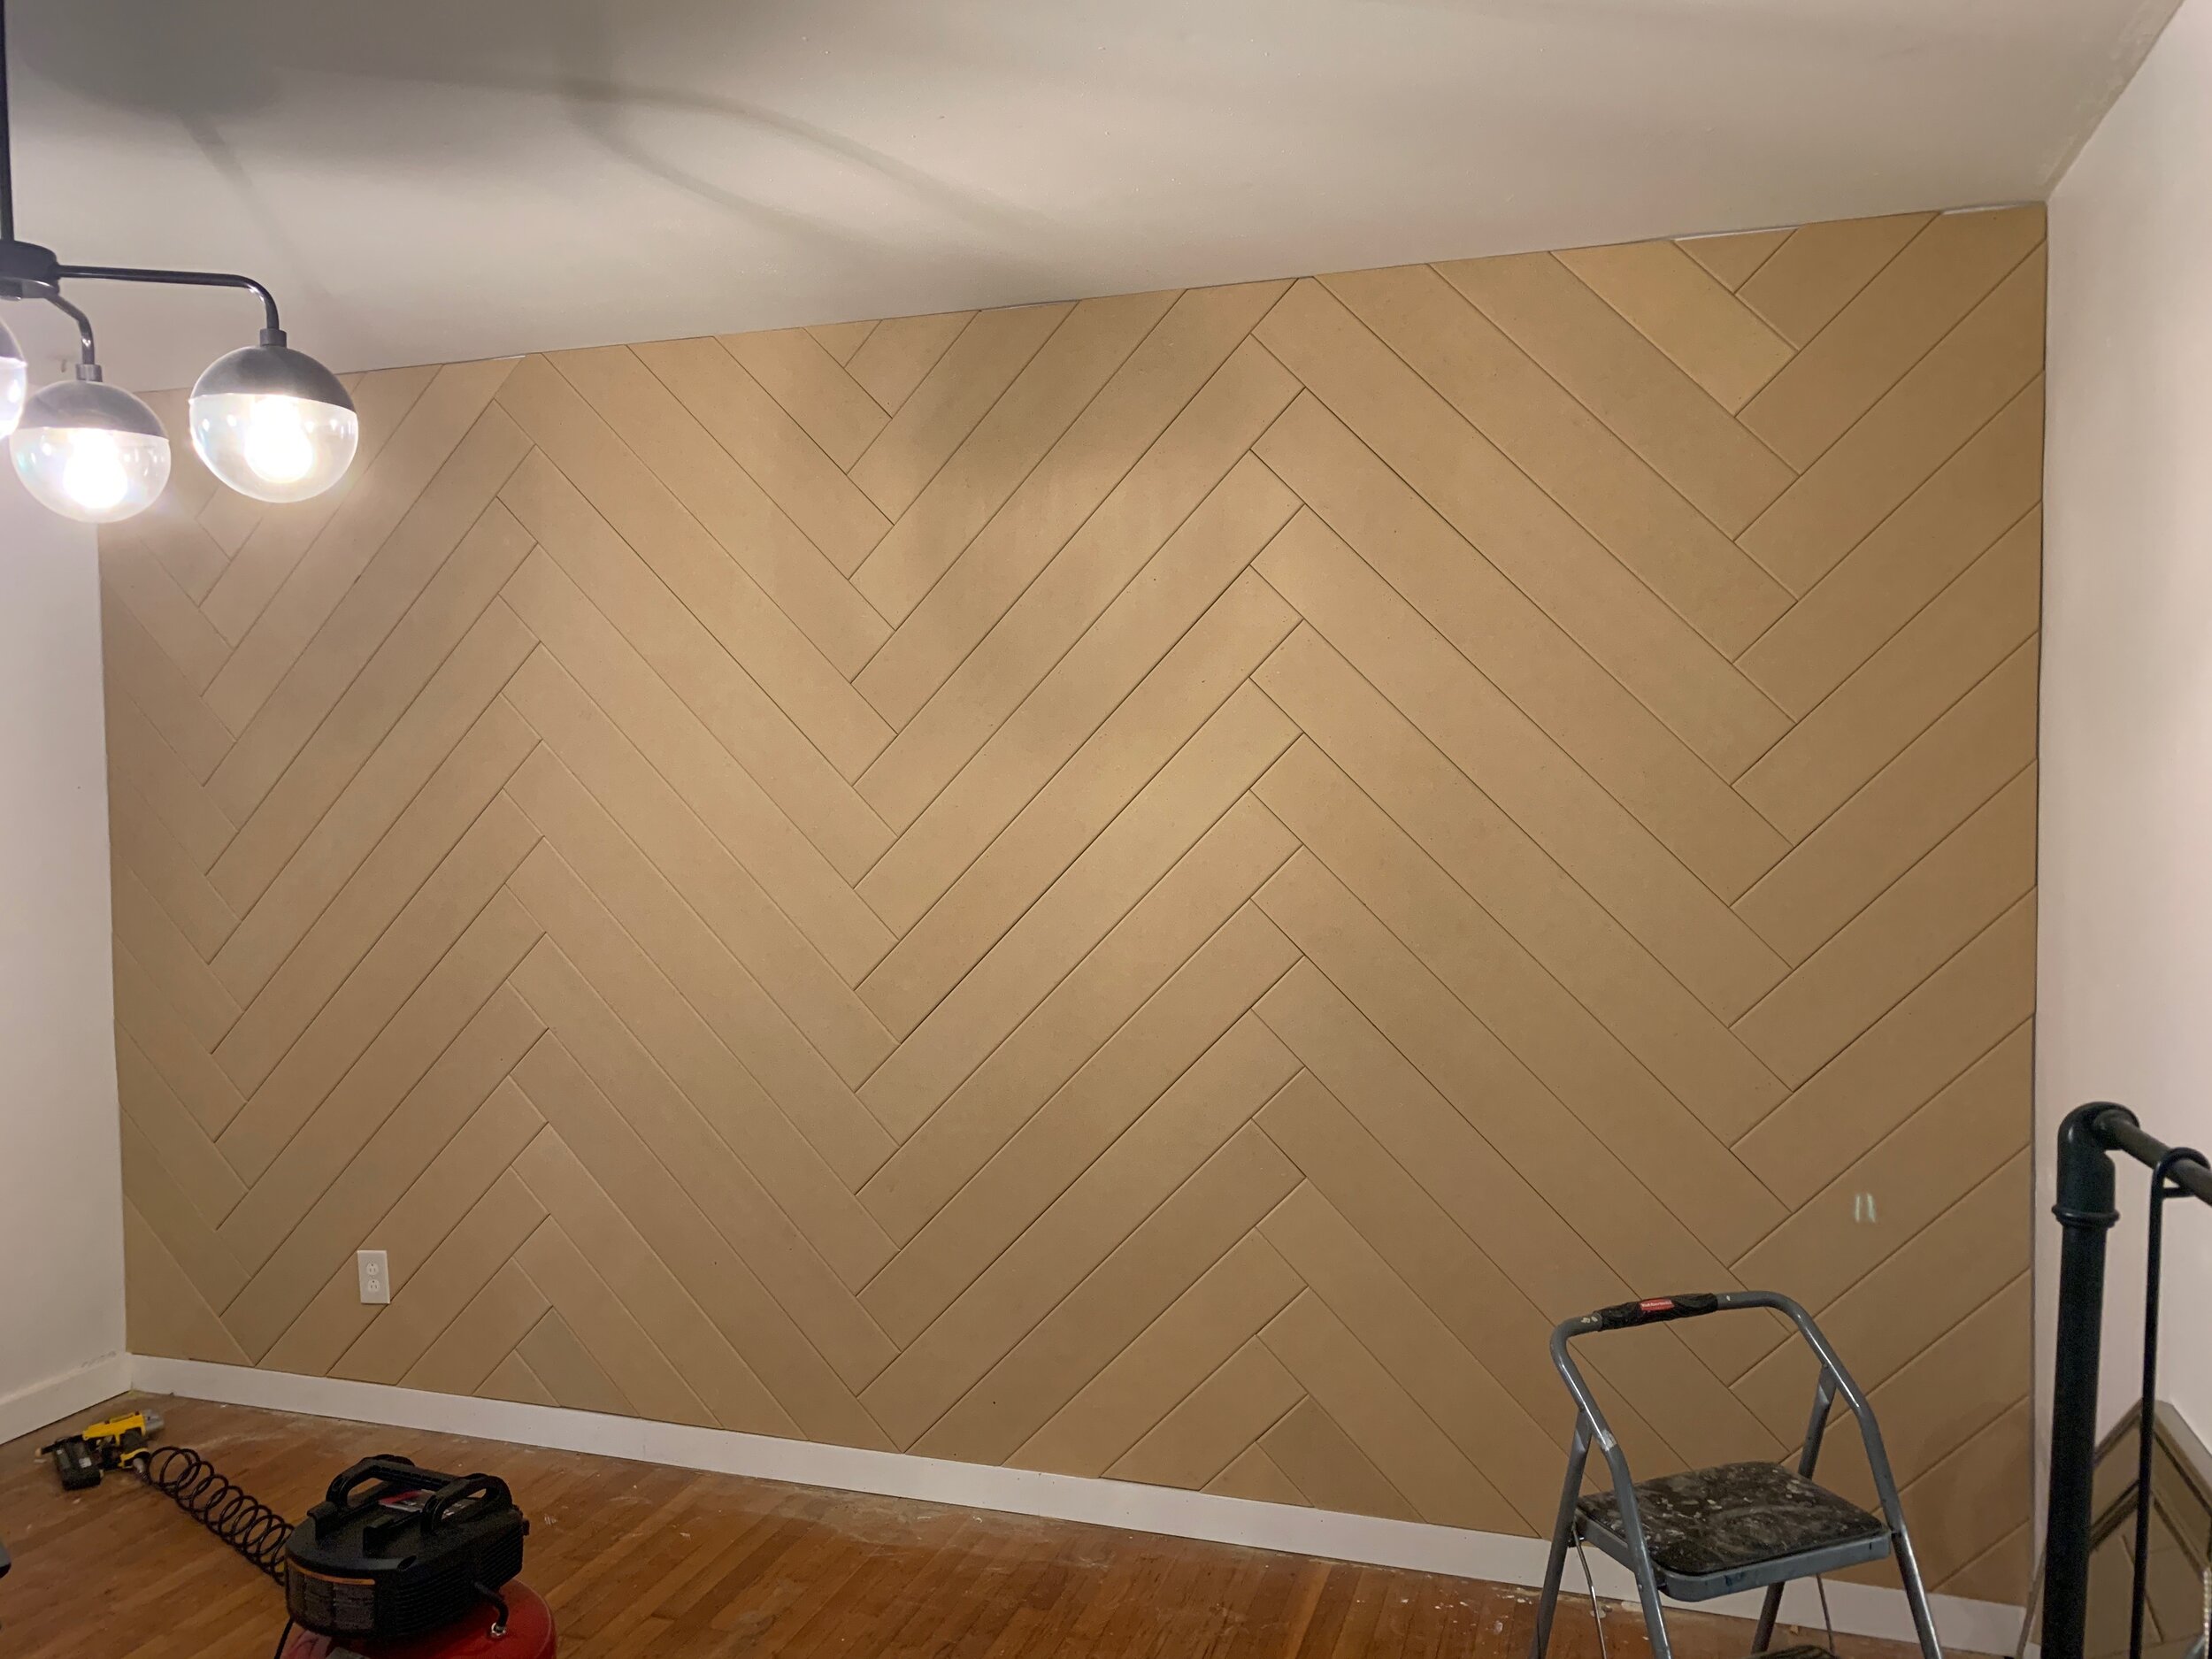
You’re done! Take a step back and admire your new Herringbone wall!


Tying It All Together
After cutting, placing the boards on the wall and caulking the edges, the next step was to paint. We chose Falling Snow by Behr in a matte finish. Although we wanted the wall’s pattern to stand out, color-wise we wanted it to blend in. The neutral color will enable us to draw focus to other parts of the room, that we continue to build on and out.

